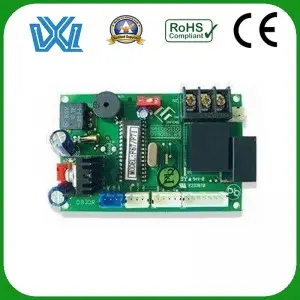
Installing a printed circuit board (PCB) inside an enclosure is a critical step in ensuring the proper operation and protection of electronic equipment. In this blog post, we will describe the necessary steps and guidelines to help you mount PCBs in enclosures safely and efficiently.
1. Planning layout:
A careful layout plan must be drawn up before mounting the PCB into the enclosure. Determines the location of components on the PCB to optimize space utilization within the enclosure. Consider the size and shape of the enclosure to ensure it has the openings required for the connectors and interfaces.
2. Check the enclosure:
Thoroughly inspect the enclosure for any signs of damage or defects that could affect the installation process or PCB functionality. Make sure the case is clean and free of any debris or other foreign objects that might interfere with the installation.
3. Prepare the PCB:
Prepare the PCB by cleaning it with an antistatic cloth or electronics cleaner. Make sure all components are properly soldered and firmly connected to the board. Double check for any loose connections or shorts that could cause problems when installing.
4. Apply insulation:
To prevent short circuits and protect the PCB from moisture or other environmental elements, it is recommended to apply an insulating material such as a thin layer of silicone or adhesive-backed insulating foam to the bottom of the PCB. This will also provide cushioning and prevent any potential friction or vibration between the PCB and case.
5. Fix the PCB:
Using appropriate mounting hardware, carefully place the PCB in the desired location within the enclosure. Depending on the size and complexity of the PCB, you can use mounting brackets, screws, or brackets. Make sure the PCB is tight, but be careful not to overtighten the screws as this may damage the PCB or stress the components.
6. Establish proper grounding:
Grounding is essential to eliminate electrostatic discharge and prevent damage to the PCB and its components. Use a ground wire or ground strap to connect the ground point of the PCB to the case to ensure a safe and reliable electrical connection. This step is especially important for devices with sensitive electronics that require additional protection from external interference.
7. Test for fit and function:
After the PCB is installed, perform a thorough test to verify its proper fit and function. Make sure that all connectors, switches, and ports line up properly with the openings in the housing. Functional testing is performed to confirm that components and the overall system function as expected.
Mounting a PCB in an enclosure is a critical design step that directly affects the reliability and performance of electronic devices. By following the steps outlined in this guide, you can confidently and efficiently mount the PCB, ensuring safe and efficient integration within the enclosure. Remember to plan the layout, inspect the enclosure, prepare the PCB, apply insulation, secure the PCB, establish proper grounding, and check for proper fit and function. Taking these necessary precautions will help you create robust assemblies, protect your PCB, and contribute to the overall success of your electronics project.
Post time: Jul-19-2023

