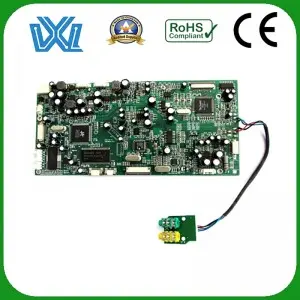
In electronics, the printed circuit board (PCB) is the backbone of most electronic devices. While the fabrication of advanced PCBs is usually done by professionals, making double-sided PCBs at home can be a cost-effective and practical option in some cases. In this blog, we will discuss the step-by-step process of making a double-sided PCB in the comfort of your own home.
1. Gather required materials:
Before diving into the manufacturing process, it’s important to gather all the necessary materials. These include copper-clad laminates, permanent markers, laser printers, ferric chloride, acetone, drill bits, copper-plated wire, and safety equipment such as gloves and goggles.
2. Design the PCB layout:
Using PCB design software, create a schematic of the electronic circuit you want to build. After the schematic is complete, design the PCB layout, placing different components and traces as needed. Make sure the layout is suitable for a double-sided PCB.
3. Print the PCB layout:
Print the PCB layout onto glossy paper using a laser printer. Make sure to mirror the image horizontally so it transfers correctly to the copper clad board.
4. Transmission layout:
Cut out the printed layout and place it face down on the copper clad board. Secure it in place with tape and heat it with an iron over high heat. Press firmly for about 10 minutes to ensure even heat distribution. This will transfer the ink from the paper to the copper plate.
5. Etching plate:
Carefully remove the paper from the copper clad board. You will now see the PCB layout transferred to the copper surface. Pour enough ferric chloride into a plastic or glass container. Dip the board into the ferric chloride solution, making sure it is completely covered. Gently stir the solution to speed up the etching process. Remember to wear gloves and goggles during this step.
6. Clean and inspect the circuit board:
After the etching process is complete, the board is removed from the solution and rinsed with cold water. Trim the edges and gently scrub the board with a sponge to remove excess ink and etch residue. Dry the board completely and check for any potential errors or problems.
7. Drilling:
Using a drill with a small bit, carefully drill holes on the PCB at designated locations for component placement and soldering. Make sure the hole is clean and free of any copper debris.
8. Welding components:
Place the electronic components on both sides of the PCB and secure them with clips. Use a soldering iron and solder wire to connect the components to the copper traces. Take your time and make sure the solder joints are clean and firm.
in conclusion:
By following these step-by-step instructions, you can successfully make a double-sided PCB at home. While the process may initially involve some trial and error, with practice and attention to detail, you can achieve professional results. Remember to always put safety first, wear proper protective gear and work in a well-ventilated area. So unleash your creativity and start building your own double-sided PCBs!
Post time: Jul-14-2023

